Friday, November 20, 2009

Disable Automatic Windows Update

The default setting in Windows XP is to have XP scan for updates automatically.

If you follow a specific routine for your updates or if your connection doesn’t effectively support having this feature run automatically, disable it as follows:

[Control Panel] --> [Performance and Maintenance] --> [System] --> select [Automatic Updates]


Disable Automatic Restart after Windows Updates


# Start Menu --> Run type gpedit.msc and press Enter
# Group Policy Management Tools:
On the select Group Policy Object screen, peruse the list to find the specific object by order
Computer Configuration -> Administrative Template -> Windows Components -> Windows Update

# Double click on object "No auto-restart for scheduled Automatic Updates installations"
# Checkbox to enable : Enabled ,Then press "OK" button.
# Close
Group Policy Management


Wednesday, October 7, 2009

Sendmail Quick Reference


Tips and Tricks for Sendmail

mailq – Prints the mail queue's contents, same as /usr/lib/sendmail –bp

newaliases – Rebuilds the aliases database file, same as /usr/lib/sendmail –bi

hoststat – Prints persistent host status info, same as /usr/lib/sendmail -bh

purgestat – Purges (zeroes) persistent host status info, same as /usr/lib/sendmail -bH

smtpd – Runs in daemon mode, same as /usr/lib/sendmail –bd –q30

mailq –OmaxQueueRunSize=1 - Quickly print the total number of messages within mail queue

/usr/lib/sendmail –q –Otimeout.queuereturn=99d - Purges the mail queue without timing out any messages. Useful if the mail server has been down longer than the queuereturn value set in the cf.

/usr/lib/sendmail –bv foolist | grep –v deliverable - Prints only undeliverable addresses from in the mail list foolist. Great for use in a shell script to remove badd addresses from a mailing list.

Command Line Switches

-B 7bit - Causes sendmail to clear the high-bit of every incoming byte.

-B 8bitmime – Causes sendmail to preserve the high-bit or every incoming byte.

-ba – Uses ARPAnet/Grey-Book protocols to transfer mail.

-bD – Runs as daemon, like –bd, but does not fork and does not detach from controlling terminal.

-bd – Runs as daemon, forks and detaches.

-bH - Purges (zeroes) persistent host status info.

-bh - Prints persistent host status info.

-bi - Initializes the aliases database.

-bm – Causes sendmail to read and send message (this is the default)

-bp – Prints the contents of the mail queue.

-bs – Runs sendmail on standard I/O.

-bt – Runs sendmail in rule testing mode.

-bv
- Verifies address.

-C /tmp/different.cf – Uses different.cf as its configuration file.

-c - Sets HoldExpensive option to true.

-d - set debug mode.

* -d0 – Shows general config
* -d0.1 – Prints version
* -d.04 – Prints local hostname and any aliases for it.
* -d0.15 – Prints the list of delivery agents declared
* -d0.20 – Prints address of each network interface
* -d8 – Traces most DNS lookups
* -d8.1 – Prints failure of low level MX searches.
* -d8.2 – Prints calls to getcanonname
* -d8.3 - Traces dropped local hostnames
* -d8.5 – Shows hostnames tried in getcanonname
* -d8.8 – Shows when MX lookups return the wrong type.
* -d11 – Traces delivery agent calls
* -d11.1 – Traces arguments passed to the delivery agent
* -d11.2 - Prints the user ID that the delivery agent is invoked as
* -d21 – Traces rewriting of addresses
* -d21.1- Traces general ruleset rewriting
* -d21.2 – Traces use of $& macro
* -d21.3 – Shows $> subroutines called
* -d21.4 – Displays result of rewrite
* -d21.15 – Shows $digit replacement
* -d21.35 – shows token by token LHS matching
* -d27 – Traces aliasing
* -d27.1 – Traces general aliasing
* -d27.2 – Traces :include: files, alias self-references, and errors on home
* -d27.3 – Traces the ~/.forward path and the alias wait
* -d27.4 – Prints "not safe" when a file is unsafe to trust
* -d27.9 – Shows uid/gid changes when reading :include: files
* -d35 – Traces macros
* -d35.9 shows macro values as they are defined
* -d35.14 – Shows macro names being converted to integer id’s
* -d35.24 – Shows macro expansion
* -d37 – Traces options and class macros
* -d37.1 – Traces the setting of options
* -d37.8 – Traces the adding of words to a class
* -d41 – Traces the queue
* -d41.1 – Traces queue ordering
* -d41.2 – Shows failure to open qf files
* -d41.49 – Shows skipped queue files
* -d41.50 – Show every file in queue

-F - Set senders full name

-f
- Set senders address

-h - Set minimum hop count

-i – Set IgnoreDots option to true

-M - Set macro

-N - Set return DNS notify information

* never – Never return the info
* success – Return on successful delivery
* failure – Return on failure
* delay – Return on delayed delivery

-n – Supresses aliasing

-O - Set an option (long name)

-o – Set an option (short name)

-pUUCP:test – Sets protocol in $r macro to UUCP and $s macro to test

-q30m – Sets queue processing to every 30 min

-qR@here.com – Processes the queue once delivering only mail to @here.com

-R hdrs – bounces only the headers

-R full – Bounces headers and body

-s – Sets SaveFromLine option to true

-T 5d – Sets Timeout.queuereturn option to 5 days

-t – Gathers a list of recipients from messages headers

-U – make this the initial MUA to MTA submission

-V test123456 – Sets the DSN ENVID string to test123456

-v – Runs sendmail in verbose mode

-X /var/tmp/trace.mail – Logs both sides of smtp transactions to trace.mail file.


Rule Testing Mode (/usr/lib/sendmail –bt)

? – Prints help

.DrUUCP – Defines macro r as UUCP

=S5 – Prints the contents of ruleset 5

=M – Displays list of delivery agents

${name} – Prints the value of macro name.

$=w – prints the contents of the class macro w

/mx here.com – Returns the MX records for here.com in the order they will be utilized

/parse foo – Parses the value of the address foo, returns the value of crackaddr(), and the final parsed address including the delivery agent.

/try local foo – Rewrites the address foo based on the rules for local delivery

/tryflags HS – Sets the flags used by /parse and /try to H for header and S for sender, can also use E for envelope and R for recipient

/canon foo - Transforms the hostname foo into its canonical form

/map aliases foo – Looks up foo in the aliases database

3,0 – me@foo – Runs the address me@foo through rulesets 3 and 0

Monday, August 24, 2009

dim_STAT installation on Solaris 10

DOWNLOAD LINK: http://dimitrik.free.fr

As the root user,
bash-3.00# tar xvf dim_STAT.tar

bash-3.00# cd dim_STAT-INSTALL/
bash-3.00# ls
ExpReport_15.tar.Z LICENSE-GPLv2.txt LICENSE.txt README.sol86 UNINSTALL.txt anySTAT soft
INSTALL.sh LICENSE-freeware.txt README STAT-service UserGuide conf x.install
bash-3.00# ./INSTALL.sh


===========================================
** Starting dim_STAT Server INSTALLATION **
===========================================

HOSTNAME: solten
IP: ::1
DOMAINE:

Is it correct? (y/n): n
** Hostname [solten]: solten
** IP addres [::1]: 192.168.2.222
** Domainname []: admincmd.blogspot.com
**
** ATTENTION!
**
** On your host You have to assign a USER/GROUP pair as owner
** of all dim_STAT modules (default: dim/dim)

User: dim
Group: dim
Is it correct? (y/n): y


**
** WARNING!!!
**
** User dim (group dim) is not created on your host...
** You may do it now by yourself or let me do it during
** installation...
**

May I create this USER/GROUP on your host? (y/n): y


======================================
** dim_STAT Directory Configuration **
======================================

** WebX root directory (5MB):
=> /WebX
=> /opt/WebX
=> /etc/WebX

[/opt/WebX]:


** HOME directory for dim_STAT pkgs [/apps]:
** TEMP directory [/tmp]:

** HTTP Server Port [80]: 999 ** DataBase Server Port [3306]: ** Default STAT-service Port [5000]: 1999
================================================== ** Process... ================================================== => Host : solten => IP address : 192.168.2.222 => Domain : admincmd.blogspot.com => User : dim => Group : dim => WebX root directory : /opt/WebX => HOME directory : /apps => TEMP directory : /tmp => HTTP Server Port : 999 => DataBase Server Port : 3306 => Default STAT-service Port : 1999

Is it correct? (y/n): y


** !!
** !! !!! WARNING !!!
** !! ---------------
** !!
** !! ALL DATA will be DELETED!!! in: /apps/* !!!
** !! as well /WebX, /etc/WebX, /opt/WebX !!!
** !!
Delete all data? (y/n): y


** Cleanup /apps
** Add User...
** WebX Setup...
** dim_STAT Server extract...
** HTTP Server Setup...
** Database Server Setup...
** ADMIN/Tools Setup...
** TEMP directory...
** Permissions...
** Crontab Setup...
Sun Microsystems Inc. SunOS 5.10 Generic January 2005


**
** INSTALLATION is finished!!!
**
May I create now a dim_STAT-Server start/stop script in /etc/rc*.d? (y/n): y
============================================================================
NOTE:
=>
=> Please, set a password to the user dim
=> to enable clean up procedure via cron!..
=>


** =========================================================================
**
** You can start dim_STAT-Server now from /apps/ADMIN:
**
** # cd /apps/ADMIN
** # ./dim_STAT-Server start
**
** and access homepage via Web browser - http://solten:999
**
** To collect stats from any Solaris-SPARC/x86 or Linux-x86 machines
** just install & start on them [STAT-service] package...
**
** Enjoy! ;-)
**
** -Dimitri
** =========================================================================


bash-3.00# cd /apps/ADMIN/ bash-3.00# ./dim_STAT-Server start
================[ dim_STAT-Server: start ]================

*
* MySQL Database Server
*
=> Log output : /apps/mysql/data/mysqld.log.3306
=> Local socket: /apps/mysql/data/mysql.sock.3306
=> Admin Access: root# /apps/mysql/bin/mysql -S /apps/mysql/data/mysql.sock.3306

Starting...
Starting mysqld daemon with databases from /apps/mysql/data
Done.
Starting HTTP server from: /apps/httpd
Done.
================[ dim_STAT-Server: start -- done. ]================


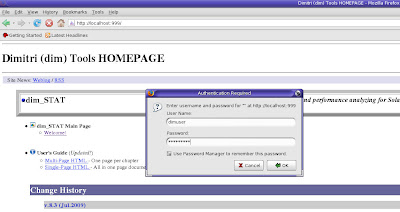
TEST
Config First level security
1) via /apps/httpd/bin/htaccess create /apps/httpd/etc/.htpasswd file and add any pairs of user/password you need
2) create ".htaccess" file with context:

AuthName "Welcome to dim_STAT Host"
AuthType Basic
AuthUserFile /apps/httpd/etc/.htpasswd

require valid-user

3) copy ".htaccess" file into /apps/httpd/home/docs and /apps/httpd/home/cgi-bin
4) try to connect to your web server now and check the access user/password - that's all!

For example:
1) add user/password
bash-3.00# /apps/httpd/bin/htpasswd -c /apps/httpd/etc/.htpasswd dimuser
Adding password for dimuser.
New password:
Re-type new password:

2)create ".htaccess"
bash-3.00# vi .htaccess
Adding....

AuthName "Welcome to dim_STAT Host"
AuthType Basic
AuthUserFile /apps/httpd/etc/.htpasswd

require valid-user

bash-3.00# cat .htaccess

3) copy ".htaccess" to destination
bash-3.00# cp /tmp/.htaccess /apps/httpd/home/cgi-bin
bash-3.00# cp /tmp/.htaccess /apps/httpd/home/docs
bash-3.00# cd /apps/ADMIN
bash-3.00# ./dim_STAT-Server stop
bash-3.00# ./dim_STAT-Server start
4)Login again


Wednesday, August 19, 2009

Change default gateway in Sun Solaris 10

Default Gateway or the Default Router is the IP address (IPv4)

Default Gateway is maintained in the file /etc/defaultrouter
This file should contain an entry for each router directly connected to the network. The entry should be the name for the network interface that functions as a router between networks.

How to add or Edit

- If you wish to add or edit the default gateway ,edit /etc/defaultrouter file and update the IP Address.
- Use the command to manually configure the routes in the routing table.
# route delete default 192.1.1.1 <--remove the dexisting default gateway
# route add default 192.1.1.1 <--Add new default gateway


View the existing Kernel IP Routing table;
# netstat -nr
Routing Table: IPv4
Destination Gateway Flags Ref Use Interface
——————– ——————– —– —– ———- ———
192.168.0.0 192.1.1.1 U 1 115 eth0
default 192.1.1.1 UG 1 25
127.0.0.1 127.0.0.1 UH 5 2 lo0


After changing default router restart network service;
#svcadm restart network/physical


For a detailed Man Page for /etc/defaultrouter click here

Friday, August 7, 2009

Invalid default value for 'logTime'

Process of database restoration using the following SQL query :

CREATE TABLE `smf_log_online` (
SESSION varchar( 32 ) NOT NULL default '',
logTime timestamp default 'CURRENT_TIMESTAMP' ,
ID_MEMBER mediumint( 8 ) unsigned NOT NULL default 0,
ip int( 10 ) unsigned NOT NULL default 0,
url text NOT NULL default '',
PRIMARY KEY ( SESSION ) ,
KEY logTime( logTime ) ,
KEY ID_MEMBER( ID_MEMBER )
) TYPE = MYISAM


There is a massive problem occur, The following message:

" #1067 - Invalid default value for 'logTime' "


For this problem you need to change SQL statement to get it to work following:

remove '' from '
CURRENT_TIMESTAMP' ..

CREATE TABLE `smf_log_online` (
SESSION varchar( 32 ) NOT NULL default '',
logTime timestamp default CURRENT_TIMESTAMP ,
ID_MEMBER mediumint( 8 ) unsigned NOT NULL default 0,
ip int( 10 ) unsigned NOT NULL default 0,
url text NOT NULL default '',
PRIMARY KEY ( SESSION ) ,
KEY logTime( logTime ) ,
KEY ID_MEMBER( ID_MEMBER )
) TYPE = MYISAM


Monday, July 27, 2009

Apache Service error msg: no listening sockets available, shutting down.

if you could not start the apache service and error message in Event v iewer show you that an error occurred.
The Apache service named reported the following error:
>>> no listening sockets available, shutting down .

and
The Apache service named reported the following error:
>>> Unable to open logs

Solutions:
-Web servers accept incoming connections by listening on port 80 by default. Type "netstat -an" from a command prompt. You will see the actual port numbers currently being used by another application.You can change apache port to another port, by editing httpd.conf in the apache folder under conf. and then restart a proccess
for example:

# Change this to Listen on specific IP addresses as shown below to
# prevent Apache from glomming onto all bound IP addresses (0.0.0.0)
#
#Listen 12.34.56.78:80
#Listen 80
Listen 888

-Remove comment "#" before "Listen 80" , by editing httpd.conf in the apache folder under conf. and then restart a proccess
for example:

# Change this to Listen on specific IP addresses as shown below to
# prevent Apache from glomming onto all bound IP addresses (0.0.0.0)
#
#Listen 12.34.56.78:80
Listen 80

Friday, June 26, 2009

The benefits to using VoIP. (PBX)


The benefits to using VoIP.

แน่นอนว่าเทคโนโลยีใหม่ย่อมนำสิ่งที่ดีกว่ามาให้เสมอ สำหรับ VoIP ก็เช่นเดียวกัน ประการสำคัญของประโยชน์ที่ได้รับจาก VoIP คง ต้องเป็นเรื่องการลดค่าใช้จ่ายในการโทรศัพท์ขององค์กรลง ไม่ว่าจะเป็นการโทรในพื้นที่เดียวกันหรือโทรทางไกล แม้กระทั่งการโทรต่างประเทศ ทั้งโทรภายในองค์กรเองหรือโทรติดต่อกับหน่วยงานอื่นๆหรือลูกค้า ล้วนแล้วแต่ได้รับประโยชน์ในเรื่องค่าใช้จ่ายในการโทรศัพท์ทั้งสิ้น ซึ่งประโยชน์ที่ได้รับจากการนำ VoIP มาใช้อาจสรุปประเด็นเป็นข้อๆ ได้เช่น

1. ลดค่าใช้จ่าย (Cost Savings) ใน การติดต่อสื่อสารทางโทรศัพท์ลง เนื่องจากเสียงได้ถูกเปลี่ยนให้อยู่ในรูปแบบเดียวกับข้อมูล จึงทำให้สามารถส่งสัญญาณเสียงไปในเครือข่าย LAN หรือ WAN ได้เลย ไม่ต้องผ่านเครือข่าย PSTN ที่มีค่าใช้จ่ายสูงกว่า

2. เพิ่มความยืดหยุ่นในการติดต่อสื่อสารให้กับองค์กร เช่น ในสาขาหรือ Siteงานชั่วคราว สามารถนำ VPN ร่วมกับ VoIP ประกอบกันเพื่อสร้างระบบการติดต่อสื่อสารเต็มรูปแบบภายในองค์กรได้อย่างง่ายดายและรวดเร็ว

3. จัดการ ระบบเครือข่ายได้ง่ายขึ้น เนื่องจากเครือข่ายการติดต่อสื่อสารทั้งหมด สามารถยุบรวมกันให้เหลือเพียงเครือข่ายเดียวได้ อีกทั้งในกรณีที่มีการโยกย้ายของหน่วยงานหรือพนักงาน การจัดการด้านหมายเลขโทรศัพท์และอื่นๆ สามารถทำได้โดยไม่จำเป็นต้องเดินสายสัญญาณใดๆขึ้นมาใหม่

4. รองรับการขยายตัวของระบบในอนาคต หากในอนาคตองค์กรขยายตัวใหญ่ขึ้น VoIP สามารถรองรับผู้ใช้งานได้เพิ่มมากขึ้นในทันทีโดยการเพิ่ม "Virtual" User เข้าไปในระบบเท่านั้นเอง
5. ลดค่าใช้จ่ายในการดูแลและจัดการระบบ (Reduce Operating Expenses) เนื่องจากใช้ซอฟต์แวร์ในการจัดการ ทำให้ VoIP นั้นง่ายในการจัดการและบำรุงรักษา
6. เพิ่มประสิทธิภาพการทำงาน (Increase Productivity) พนักงานสามารถส่งเอกสารผ่านเครือข่ายควบคู่ไปกับการสนทนา หรืออาจจัดการประชุมออนไลน์(Conference Call) ทั้งภาพและเสียง และแม้กระทั่งส่งเอกสารการประชุมให้กับผู้เข้าร่วมประชุมผ่านทางเครือข่ายได้อีกด้วย
7. ใช้ร่วมกับการสื่อสารไร้สายได้ ทำให้อุปกรณ์สื่อสารไร้สายต่างๆ เช่นโทรศัพท์มือถือหรือPDA สามารถติดต่อผ่าน VoIP เข้ามาในเครือข่ายขององค์กรได้
8. เพิ่มประสิทธิภาพในการติดต่อกับลูกค้า (Improved Level of Services) โดยใช้ความสามารถของแอพพลิเคชั่นต่างๆ ของ VoIP เช่น "Click-to-talk" เพื่อเพิ่มความสะดวกและรวดเร็วในการติดต่อกับลูกค้า

ตัวอย่าง Application การใช้งานเทคโนโลยี VoIP

1. PBX to PBX Connection
• ทั้ง 2 ฝั่งของสำนักงานจะสามารถใช้งานตู้สาขา PBX ของสำนักงานอีกฝั่งเปรียบเสมือนตู้สาขา PBX ของฝั่งตัวเอง
• Users ภายในไม่จำเป็นต้องทำการ Dial-out ออกไปบนระบบโทรศัพท์ PSTN เพื่อทำการเชื่อมต่อเข้ากับตู้สาขา PBX ของสำนักงานอีกฝั่ง

2. Long Line PBX Extension
• เป็นการเชื่อมต่อที่สำนักงานใหญ่ขยายการเชื่อมต่อตู้สาขา PBX ไปที่สำนักงานสาขาที่ไม่มีตู้ PBX ใช้งานอยู่
• ทางสำนักงานสาขาสามารถใช้งานตู้ PBX ผ่านทางสำนักงานใหญ่ได้เสมือนกับเป็นตู้สาขา PBX ของฝั่งตนเอง

3. Teleworker/ Local Access
• เป็นการเชื่อมต่อที่ยินยอมให้ Remote User ฝั่ง สำนักงานใหญ่สามารถใช้งานโทรศัพท์เข้ามาที่สำนักงานใหญ่ แล้วใช้ระบบเครือข่ายของสำนักงานใหญ่เชื่อมต่อไปยังสำนักงานสาขาผ่าน เทคโนโลยี VoIP เพื่อสามารถใช้งานโทรศัพท์ในพื้นที่ของสำนักงานสาขาได้โดยเสียค่าบริการในอัตราของพื้นที่ของสำนักงานสาขานั้นๆ

4. Service Provider CPE
• ผู้ให้บริการต่างๆ เช่น... ISP สามารถที่จะเสนอบริการเสริมต่างๆ ทางด้าน VoIP
บนระบบเครือข่ายความเร็วสูงที่มีการใช้งานอยู่เดิมแล้ว

จากที่ได้กล่าวมาแล้วทั้งหมด... เป็นการแนะนำให้ทราบถึงเทคโนโลยี VoIP และการนำเทคโนโลยี VoIP มาประยุกต์เพื่อใช้งานได้มากยิ่งขึ้น


ที่มา: http://www.vcharkarn.com/include/article/showarticle.php?Aid=17875&page=4

Friday, May 8, 2009

STARTUP/SHUTDOWN GLASSFISH ADMIN SERVER

The ‘asadmin’ utility is used to perform several administrative tasks on the Application Server. The server life cycle commands such as ‘start-domain’ is used to start the domain named domain-1 and ‘stop-domain’ is used to stop the Administration Server of the domain-1.

How to start?

log in as root:

#cd /www/opt/SUNWappserver/bin

#./asadmin start-domain domain1

#./asadmin start-node-agent

Starting Domain domain1, please wait.

Log redirected to ..........\domain1\logs\server.log.

Redirecting output to ..........\domains\domain1\logs\server.log

Domain domain1 started.

Domain [domain1] is running [Sun Java System Application Server 9.1_01 (build b09d-fcs)] with its configuration and logs at: [.......\domains].

Admin Console is available at [http://localhost:4848].

Use the same port [4848] for "asadmin" commands.

User web applications are available at these URLs:

[http://localhost:8080 https://localhost:8181 ].

Following web-contexts are available:

[/web1 /__wstx-services jpa-example ].

Standard JMX Clients (like JConsole) can connect to JMXServiceURL:

[service:jmx:rmi:///jndi/rmi://rajus01-755:8686/jmxrmi] for domain management purposes.

Domain listens on at least following ports for connections:

[8080 8181 4848 3700 3820 3920 8686 ].

Domain supports application server clusters and other standalone instances.

How to stop?

#cd /www/opt/SUNWappserver/bin

#./asadmin stop-node-agent

#./asadmin stop-domain domain1

Domain domain1 stopped.


Friday, April 3, 2009

"netstat" - state information on network connections


"netstat" - state information on network connections

The following is sample output using one of the netstat option:
netstat -na|more

Active Connections

Proto Local Address Foreign Address State
TCP 108.168.7.21:139 0.0.0.0:0 LISTENING
TCP 10.17.7.21:1960 20.46.19.9:1863 ESTABLISHED
TCP 10.17.7.21:2971 20.18.11.20:8080 ESTABLISHED
TCP 127.0.0.1:1036 0.0.0.0:0 LISTENING
TCP 127.0.0.1:1110 127.0.0.1:1111 ESTABLISHED
TCP 127.0.0.1:1111 127.0.0.1:1110 ESTABLISHED
TCP 127.0.0.1:1113 127.0.0.1:1114 ESTABLISHED
TCP 127.0.0.1:1114 127.0.0.1:1113 ESTABLISHED
TCP 127.0.0.1:2970 127.0.0.1:30606 ESTABLISHED
TCP 127.0.0.1:5152 0.0.0.0:0 LISTENING
TCP 127.0.0.1:5152 127.0.0.1:1117 CLOSE_WAIT
TCP 127.0.0.1:5354 0.0.0.0:0 LISTENING
TCP 127.0.0.1:30606 0.0.0.0:0 LISTENING
TCP 127.0.0.1:30606 127.0.0.1:2932 TIME_WAIT
TCP 127.0.0.1:30606 127.0.0.1:2936 TIME_WAIT
TCP 127.0.0.1:30606 127.0.0.1:2966 TIME_WAIT
TCP 127.0.0.1:30606 127.0.0.1:2970 ESTABLISHED
TCP 127.0.0.1:62514 0.0.0.0:0 LISTENING


The states are defined as follows:

* CLOSED
Connection is closed.

* LISTEN
Listening for a connection.

* SYN_SENT
Active; sent SYN. Waiting for a matching connection request after having sent a connection request.

* SYN_RCVD
Sent and received SYN. Waiting for a confirming connection request acknowledgment after having both received and sent connection requests.

* ESTABLISHED
Connection established.

* CLOSE_WAIT
Received FIN; waiting to receive CLOSE.

* LAST_ACK
Received FIN and CLOSE; waiting for FIN ACK.

* FIN_WAIT_1
Closed; sent FIN.

* CLOSING
Closed; exchanged FIN; waiting for FIN.

* FIN_WAIT_2
Closed; FIN is acknowledged; awaiting FIN.

* TIME_WAIT
In 2 MSL (twice the maximum segment length) quiet wait after close.

Thursday, March 26, 2009

Oracle9iAS List of Ports in Use


The table below shows the ports that were assigned during installation.
Service Port
Enterprise Manager Repository port1521
Enterprise Manager Servlet port1810
Java Object Cache port7000
Oracle HTTP Server Jserv port8007
Oracle HTTP Server SSL listen port4445
Oracle HTTP Server SSL port4444
Oracle HTTP Server listen port7780
Oracle HTTP Server port7778
Oracle Intelligent Agent1748, 1754, 1808, 1809
Oracle Net Listener1521
Oracle Notification Service local port6101
Oracle Notification Service remote port6201
Oracle Notification Service request port6004
Oracle Reports Server port1950
Oracle9iAS Clickstream Collector Agent6666
Oracle9iAS Clickstream Collector Server6675
Oracle9iAS Clickstream Execution Engine6676
Oracle9iAS Discoverer port7778
Oracle9iAS Web Cache Admin port4003
Oracle9iAS Web Cache HTTP Listen(SSL) port4444
Oracle9iAS Web Cache HTTP Listen(non-SSL) port7778
Oracle9iAS Web Cache Invalidation port4004
Oracle9iAS Web Cache Statistics port4005

Tuesday, February 17, 2009

How to manage file : when name contains "-" as first character


when name contains "-" as first character
u can use "./"
Error:
#rm -sealert_12012009.log
rm: invalid option -- s
Try `rm ./-sealert_12012009.log' to remove the file `-sealert_12012009.log'.
Try `rm --help' for more information.


Ex.

#ls -l
-rw-rw-r-- 1 root root 0 Jan 12 18:39 -sealert_12012009.log
-rw-rw-r-- 1 root root 0 Jan 13 18:39 -sealert_13012009.log
....

Remove:
#rm ./-*.log

Move:
#mv ./-*.log /tmp/archive

when name contains " "(space) or thai char
if file name contains a space example "rman purge.txt". Add double quotes " to all argument.
Ex.
Remove:
#cd $SOURCE_PATH
#ls|while read line;do rm -i "$line";done

Move:
#cd $SOURCE_PATH
#ls|while read line;do mv -f "$line" /tmp/archive;done


^__^